How to Install Carpet in Your Classic Chevy
When you consider just how much use and abuse the typical interior carpet takes - from normal foot traffic to wet weather tracked in on feet to accidental spills - it's hard to understand why we don't replace vehicle carpet every couple of years. After all, new interior carpeting is great for upgrading your vehicle's look, and old carpeting is great for making your car look old.
But replacing carpeting isn't just about looks. Carpet dampens road noises and makes your vehicle interior a little quieter. If you take the time to place some sound deadener under your carpet you can change the character of your vehicle.
The best part? Carpet is affordable stuff - replacement carpeting for a 68-72' Chevelle, for example, is less than $200. Replacement carpeting for 4-doors (like a 60's Impala sedan) runs $200-$300, depending on year and model. Once your carpeting arrives, you'll need a couple hours to get it installed as well as a few tools.

Tools:
- Standard wrenches
- Standard socket set
- Scraper
- Utility knife
- Phillips screwdriver
- Heat gun
- Scissors
It is best to take the carpet out of the box and lay it out in the sun with the backing facing up. This takes the creases out of it, and the sun is able to heat up the plastic back. When it is softer, it will be easier to install. It also helps you see the layout of the pieces.
Instructions
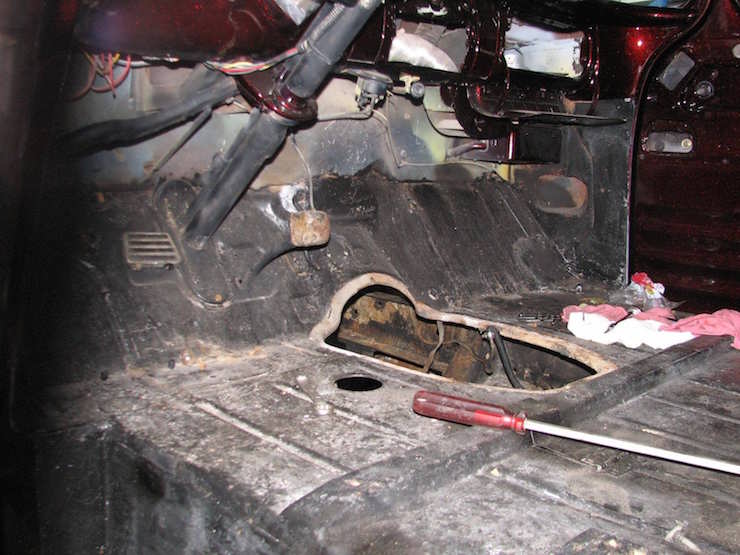
- Gut the interior of the vehicle by taking out the front and rear seats, all seat belts, doorsill plates, kick panels, floor shift and, if you have one, the center console.
- Remove the old carpet by carefully pulling it out. Watch for the build sheet. It may have been attached to the underside or taped to the pan. This sheet gives you all the details of the vehicle. This sheet is sought after and lets you know that the car has not been altered.
- Take the factory sound deadener out. It may be nothing more than a sheet of tarpaper. You will need your scraper and a lot of hard work to get it up. Once you get the majority of it up, you can use a wire wheel attached to a power drill or air compressor to clean out the cracks and crevices. It is useful to get the pan completely cleaned up if you are planning to add rustproofing before you put the new carpet down. Make sure the pan is completely clean and free from grease before you go further.
- The deadener is a tarpaper sheet that you use the heat gun to apply. It is stuck on in precut patterns, and if any of it covers seat belt holes or mounting holes, cut the material so you can install your hardware when you are finished. Looks are not important when you are installing the tarpaper, so feel free to cut and glue in whatever pattern you need.
- Once you have your deadener installed, place your carpet loosely on the floor using the center hump as your focal point. Work your way down into the pans.
- Your carpet kit is probably pre-molded to fit. The front will overlap the rear, so it may be easier to start in the back and install the rear piece first.
- Use you spray adhesive to glue down the corners of the rear section. Fold down and glue down the rear top flap of extra carpet. It will sit under the rear seat. You may need to trim the sides, and tuck it underneath the windlace and rear panels. Carefully cut while going very slowly. The more care you take now, the better the finished project will be in the end.
- Loosely fit the front carpet in place by starting on the hump. Spread the carpet down into the pans. When you get to areas that cause the carpet to bunch up, use your heat gun to soften up the backside of the carpet. This will make it more malleable. You can use spray adhesive to get it to lie flat. If it still won't lie down, cut a small slit in the carpet, which forces it to lie flat.
- Once you have the carpet tacked down, use your knife and scissors to trim up the excess carpet. You need to leave enough carpet to put under the kick panels and doorsill plates. You may need to do a lot of modification around the shifter, console and other parts. You can start the shifter by putting a small cut in the carpet and then slowing extending that cut while removing any excess. Your boot or shifter is going to cover the hole, and this will make for a nice finish.
- Go back and cut openings for the seats and the belts. Make sure that you cut through both the carpet and the deadener.
New carpet goes a long way to making your classic Chevy look showroom clean, which adds value to it.