Why You Should Put Disc Brakes on Your Tri Five
Once upon a time, if you wanted to upgrade to disc brakes for your Tri-Five, you’d have to piece together a junkyard setup. The brackets would be roughly made up, options would be limited, and the cost would probably scare you away from the project entirely. Thankfully, there are high quality kits out there now made specifically for Tri-Five disc brake upgrades that take the guess work and frustration out of the project. Here’s what you need to know about ditching those original brakes for the modern disc brakes.
Why Upgrade?
It’s a pretty simple concept: upgrading to disc brakes will dramatically improve your stopping power. Since your Tri-Five was built, decades of advancements have been made in vehicle braking systems. Most likely, you’ve driven a more modern vehicle since owning your Tri-Five, so you understand the stopping power it's lacking.
The only real reasons many people have stopped shy of doing the conversion are the problems we talked about earlier — having to piece together parts, making their own brackets, cost, etc. However, with the availability of parts and lower costs, it’s hard to make a case against converting.
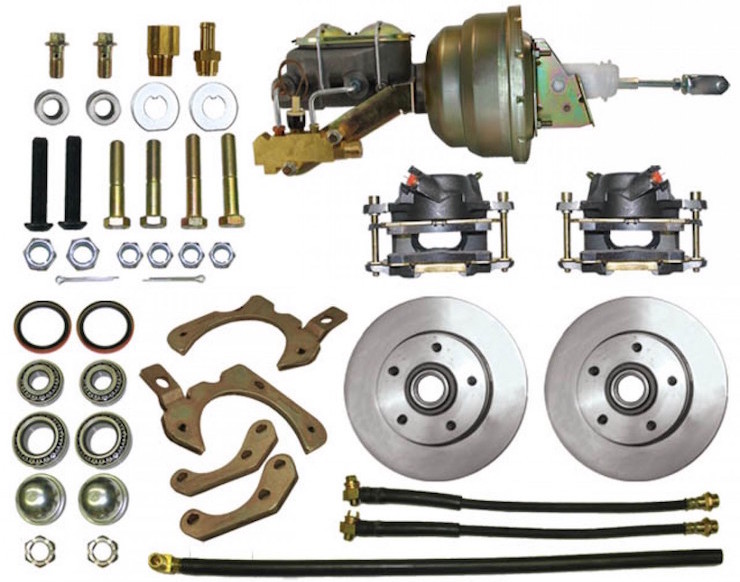
Choosing a Kit
When someone wants to upgrade brakes on their stock Tri-Five, there’s a variety of choices for them. It starts with questions like: Do you want single, dual, four, or six piston calipers? What size rotors do you need? Is your Tri-Five lowered at all? Are you going with power or manual brakes? And more, but you get the point.
Our kits are pretty straight forward and offer you a good deal of explanation between the differences in the kits, why you would choose one over the other, and so on.
Installation
Most kits are preassembled, meaning the roots and calipers are already mounted on the new spindles. They also include little parts needed for installation.
- The first step in installation is removing the cotter pins from the upper and lower ball joint nuts to loosen the nuts. Then hit the spindle mount a few time with a hammer. Unless your ball joints are on the newer side, now’s probably a good time to swap those out for new ones too.
- After breaking the ball joints loose from the spindle, remove the old drum assembly.
- The mounting bolts for the disc brakes are bigger than the drum. You’ll need to use a half inch drill to drill the holes out for the steering arms so the new bolts fit.
- With that done, put the disc assembly in place on the control arms.
- Tighten to the new castle nuts to the ball point, and install new cotter pins.
- Mount the steering arms on the brake assembly — remove the caliper and rotor to get to these bolts.
- With the brakes installed, it’s time to move onto the hydraulics. Start by removing the old drum master cylinder and drum proportioning valve.
- Before mounting the new master cylinder, attach the new proportioning valve.
- The new master will bolt right up with the brake booster.
- Now pull your old drum brake lines and install your new disc hard lines.
- Bleed the master cylinder, then bleed the brakes.
This will finish up the job and you’re now ready to roll with a ton more braking power than before!