The Complete Guide to Classic Chevy Trim and Brightwork Restoration
When enthusiasts discuss what makes a classic Chevrolet truly spectacular, the conversation inevitably turns to chrome and brightwork. These gleaming accents define the character of vintage Chevys from the optimistic 1950s through the muscle car era of the 1960s and into the 1970s. Whether you're restoring a 1957 Bel Air, a 1966 Impala SS, or a 1970 Chevelle, understanding trim and brightwork restoration separates show-quality builds from basic driver-quality projects.
Understanding Trim and Brightwork Components
Trim and brightwork encompass all the chrome, stainless steel, and polished aluminum accents adorning classic Chevrolets. These components include bumpers and bumper guards, grille assemblies and inserts, window moldings and reveal moldings, rocker panel trim, fender trim and eyebrow moldings, door edge guards and beltline trim, emblems and badges, taillight bezels and license plate frames, and interior chrome accents like dash bezels and door handles.
Era-Specific Brightwork Characteristics
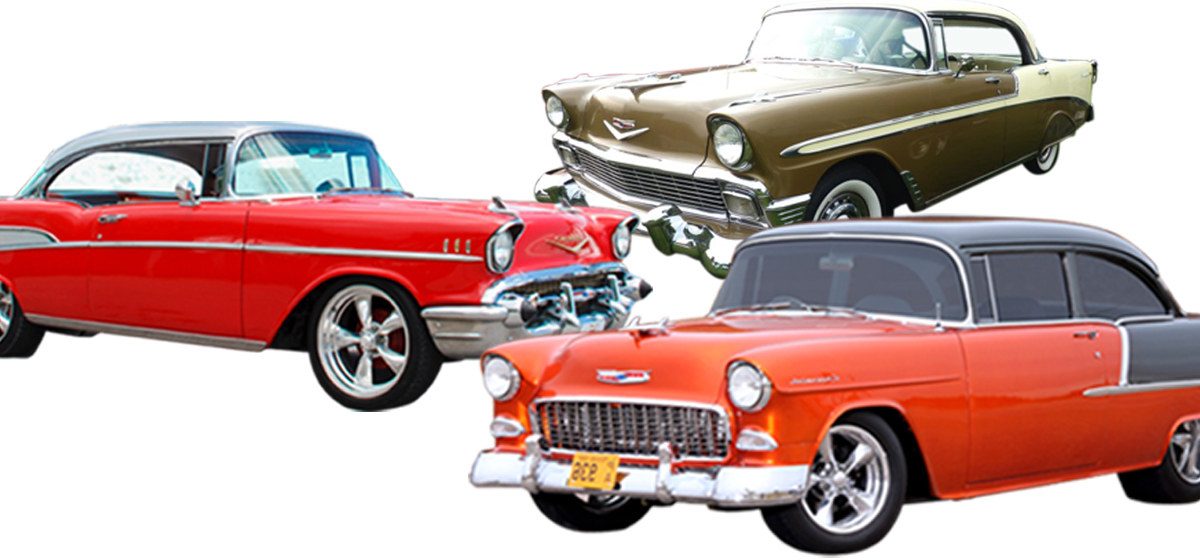
Each era of classic Chevy featured distinctive brightwork patterns. Tri-Five Chevys from 1955-1957 showcased abundant chrome reflecting post-war optimism and prosperity. The iconic 1957 Bel Air featured full-length body-side trim with anodized aluminum inserts, massive bumpers with integrated grille guards, and chrome-laden dashboards. The 1959-1960 Impalas pushed styling boundaries with exaggerated tailfins and extensive chrome appointments that defined space-age automotive design.
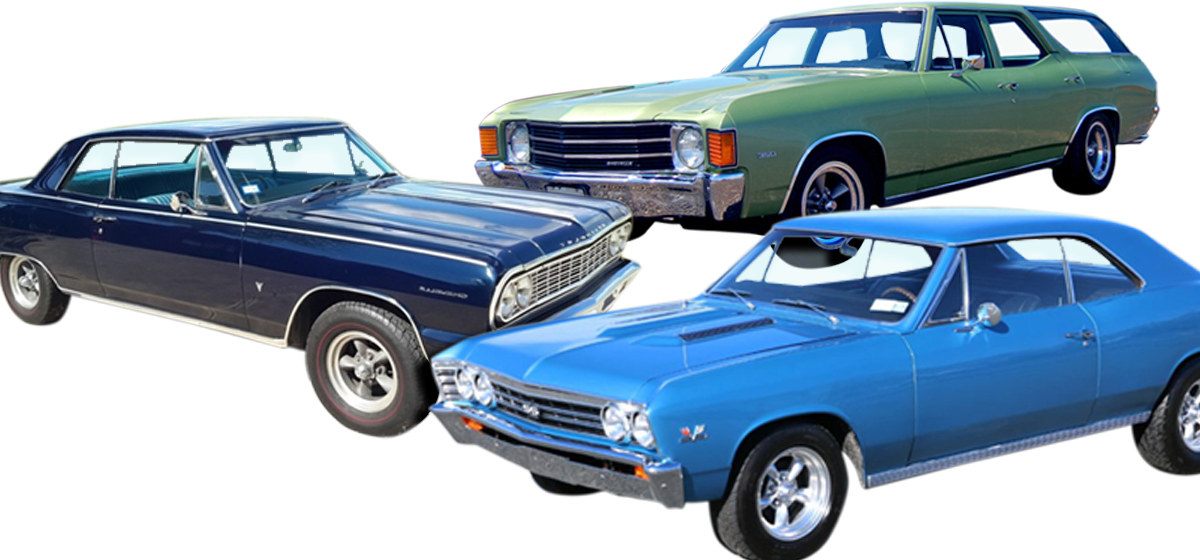
Mid-size Chevelles from 1964-1972 demonstrated more restrained but equally effective brightwork application. Super Sport models featured distinctive trim packages including fender badges, special grille treatments, and rocker panel moldings that communicated performance intentions. The muscle car era balanced aggressive styling with functional design, using chrome accents strategically rather than abundantly.
Assessing Your Trim Restoration Needs
Before purchasing replacement trim components, thoroughly evaluate existing pieces. Chrome deterioration progresses through recognizable stages. Surface oxidation appears as light cloudiness that polishing can sometimes remediate. Light pitting develops when moisture penetrates the chrome layer, creating small divots that polishing cannot eliminate. Deep pitting and rust blooming indicate advanced deterioration requiring professional re-chroming or replacement. Delamination occurs when chrome separates from the base metal substrate, rendering the piece beyond economical repair.
Evaluating Stainless and Aluminum Trim
Stainless steel trim resists corrosion better than chrome-plated steel but still suffers damage. Scratches, dents, and bent mounting tabs commonly afflict stainless components. Professional polishing can restore lightly damaged stainless trim to like-new condition. Aluminum trim, particularly anodized pieces found on Tri-Five Chevys, presents unique challenges. The anodized coating protects aluminum from oxidation, but once compromised, the bare aluminum oxidizes quickly, producing white powder that ruins the appearance.
Walk around your classic Chevy photographing every trim piece. Note missing components, damaged sections, and mounting hardware conditions. This documentation becomes invaluable when ordering parts from suppliers like H&H Classic Parts, ensuring you purchase exactly what your restoration requires. Create a prioritized list addressing the most visible and severely damaged trim first.
Sourcing Quality Reproduction Trim
The reproduction trim market offers varying quality levels. Understanding these differences helps you make informed purchasing decisions. Show-quality reproductions utilize proper base metal thickness, multiple copper and nickel plating layers before chrome application, correct finish shine matching original specifications, and accurate mounting hole locations and clip configurations. Driver-quality reproductions feature thinner base metal, fewer plating layers, and may exhibit slight dimensional variations that careful installation can accommodate.
Understanding Trim Quality Grades
H&H Classic Parts stocks trim from manufacturers who understand that authentic restoration demands proper materials and processes. Companies like Trim Parts USA utilize GM-licensed tooling, ensuring dimensional accuracy matching factory specifications. When original tooling isn't available, they engineer reproductions to original guidelines, maintaining authenticity while incorporating modern manufacturing quality improvements.
For some applications, particularly on high-value concours restorations, NOS (New Old Stock) or professionally re-chromed original parts remain preferable. NOS parts sat in warehouses for decades, offering factory-correct components that reproduction manufacturers struggle to perfectly replicate. However, NOS availability continues declining as remaining stock gets absorbed into restoration projects.
Professional re-chroming services can resurrect damaged original trim if the base metal remains structurally sound. This process strips existing chrome layers, repairs dings and imperfections, then applies fresh copper, nickel, and chrome plating layers. Quality re-chroming matches or exceeds original factory finish but costs significantly more than purchasing reproductions. Reserve re-chroming for rare pieces, NOS-unavailable components, or when period-correct authenticity justifies the expense.
Installation Best Practices
Proper trim installation requires patience, correct tools, and understanding of each component's specific mounting method. Chrome bumpers rank among the most visible and challenging trim pieces to install correctly. Before mounting new bumpers, inspect all mounting brackets and hardware for rust, damage, or wear. Replace compromised components preventing secure, aligned bumper installation.
Achieving Perfect Bumper Alignment
Bumper alignment directly affects your classic Chevy's appearance. Gaps between the bumper and body should remain consistent across the entire length. Use shims behind mounting brackets to adjust bumper position, achieving proper alignment before fully tightening mounting hardware. Never overtighten bumper bolts, which can crush brackets or distort bumper ends. Torque specifications exist for most applications, preventing damage while ensuring secure attachment.
Installing Window Moldings and Reveal Trim
Window moldings and reveal trim require especially careful handling. These components mount using clips inserted into body channels or attach via adhesive backing. When installing clip-mounted moldings, ensure clips snap fully into place without forcing. Bent clips prevent proper seating, creating gaps between molding and body. Chrome moldings scratch easily, so maintain clean hands and work surfaces throughout installation.
Adhesive-backed trim demands immaculate surface preparation. Clean mounting surfaces with isopropyl alcohol, removing all wax, silicone, and contaminants that prevent proper adhesion. Apply trim tape or professional automotive adhesive according to manufacturer instructions, understanding that most adhesives require specific temperature ranges for proper bonding. After installation, avoid washing or disturbing the trim for 24-48 hours, allowing the adhesive to fully cure.
Maintaining Brightwork After Restoration
Once you've invested time and money restoring trim and brightwork, proper maintenance preserves that investment. Chrome care begins with regular washing using pH-neutral car wash soap. Harsh detergents or acidic cleaners attack chrome plating, accelerating deterioration. After washing, dry chrome thoroughly with microfiber towels, preventing water spots that etch through chrome layers over time.
Chrome Polishing and Protection Techniques
Quality chrome polish removes light oxidation and maintains the brilliant shine that makes brightwork special. Apply polish sparingly using soft applicators, working in small sections. Buff thoroughly with clean microfiber cloths, removing all polish residue. Over-polishing, especially with abrasive compounds, gradually removes chrome plating thickness. Reserve aggressive polishing for addressing specific problem areas rather than routine maintenance.
Protect the chrome during storage or when vehicles aren't regularly driven. Apply thin coats of quality car wax, creating barriers against moisture and oxidation. Some enthusiasts prefer specialized chrome sealants offering longer-lasting protection than traditional waxes. For long-term storage, consider covering chrome components with breathable covers, preventing dust accumulation while allowing moisture evaporation.
Year and Model-Specific Considerations
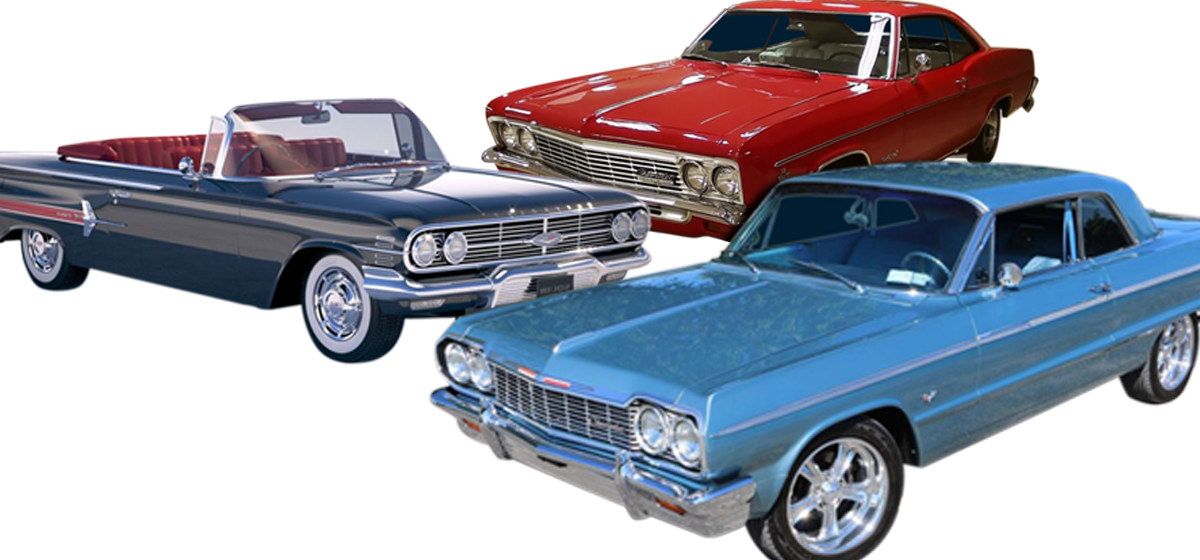
Different classic Chevy models present unique trim challenges and opportunities. Tri-Five Chevys showcase perhaps the most extensive brightwork of any classic Chevy era. The 1957 Bel Air features full-length body-side trim with gold anodized aluminum inserts that reproduce to exacting standards. These inserts fade and corrode easily, requiring careful source verification when purchasing reproductions. Factory anodizing exhibited specific color tones that quality reproductions must match.
Impala Full-Size Trim Variations
Impala full-size cars from 1958-1970 evolved through multiple design generations, each with distinct trim packages. The exaggerated tailfins of 1959-1960 models incorporate complex brightwork integration requiring precise assembly. Later 1965-1970 Impalas featured cleaner lines with more restrained trim application, but Super Sport packages added distinctive badges and moldings commanding premium prices in today's market.
Chevelle and El Camino Brightwork Details
Chevelle, Malibu, and El Camino models from 1964-1972 featured trim variations across body styles and trim levels. SS packages included specific emblems, grille treatments, and body-side moldings distinguishing them from standard models. El Caminos incorporated unique bed trim, including stake pocket covers and tailgate brightwork specific to these car-truck hybrids. Understanding these model-specific details ensures accurate restoration, maintaining proper authenticity.
Wrapping Up Car Restoration Brightwork
Trim and brightwork restoration represents the finishing touch, transforming mechanical restoration projects into visually stunning classic Chevrolets. Whether you're pursuing show-quality perfection or reliable driver-quality presentation, understanding component options, installation techniques, and maintenance requirements helps you achieve outstanding results.
H&H Classic Parts maintains an extensive inventory supporting trim restoration across all classic Chevy models from 1955 forward. Our technical team provides guidance, helping you select appropriate components for your specific application, ensuring successful restoration outcomes. From Tri-Five chrome to muscle car brightwork, we supply the quality pieces your classic Chevy deserves.
Contact H&H Classic Parts at 479-787-5575 to discuss your trim restoration needs, or explore our comprehensive online catalog featuring thousands of chrome and stainless components ready for immediate shipment. Your classic Chevy's transformation from ordinary to extraordinary begins with quality brightwork that captures the era when chrome was truly king.
FAQs: Classic Chevy Restoration and Trim Work
What's the difference between show-quality and driver-quality reproduction trim?
Show-quality reproduction trim features a thicker base metal, multiple copper and nickel plating layers before chrome application, and precise dimensional accuracy matching original factory specifications. Driver-quality trim uses thinner materials and fewer plating layers, offering an acceptable appearance at a lower cost. For concours restorations or high-visibility components like bumpers and grilles, invest in show-quality pieces. Driver-quality trim works well for less visible applications or budget-conscious builds where quality remains acceptable, but perfection isn't required.
Should I re-chrome the original trim or buy reproduction pieces?
Re-chroming original trim makes sense when base metal remains structurally sound, the part is rare or unavailable as reproduction, or you're pursuing factory-correct authenticity for concours judging. Quality re-chroming costs $300-$800+ per piece, depending on size and complexity. Reproduction trim typically costs less and ships immediately, making it preferable for common components. H&H Classic Parts can help you evaluate whether re-chroming or reproduction better serves your restoration goals and budget.
How do I prevent chrome pitting and oxidation on restored trim?
Prevent chrome deterioration through regular maintenance, including washing with pH-neutral soap, thorough drying to prevent water spots, applying quality chrome polish 2-3 times yearly, and protecting with car wax or chrome sealant. Store vehicles in climate-controlled environments when possible, as temperature fluctuations and humidity accelerate chrome oxidation. For long-term storage, apply protective coatings and use breathable covers. Never use abrasive cleaners or steel wool on chrome, which scratches plating and creates corrosion entry points.
Can I install chrome trim myself, or should I hire a professional?
Most enthusiasts can successfully install trim components with proper preparation, correct tools, and patience. Window moldings, emblems, and adhesive-backed trim require careful surface preparation but present manageable DIY projects. Chrome bumpers demand proper alignment techniques and occasionally benefit from extra hands during installation. Professional installation makes sense for complex assemblies like complete grille packages or when you lack confidence, tools, or time. H&H Classic Parts provides installation guidance, helping DIY restorers achieve professional results.
Why does my 1957 Bel Air anodized trim look different from factory photos?
Original 1957 Bel Air body-side trim featured gold anodized aluminum inserts with specific color tones that varied slightly between production batches. Reproduction inserts attempt to match this original appearance, but anodizing processes differ between manufacturers, creating color variations. Additionally, the original anodizing faded over decades from UV exposure, making pristine factory-fresh color difficult to verify. When purchasing reproduction anodized trim from H&H Classic Parts, request current production samples if color matching concerns you, understanding that slight variations from original factory tones may exist across all reproduction sources.